A Basic Introduction to Incubation
Thank you for tuning in. Today I would like to give you an explanation of the incubation process with particular emphasis on what you need to know in order to maximise the hatch rate of your clutch of eggs.
Now before we start getting into the details you really need to understand 2 things - the first is that it is very rare to get a 100% hatch rate - having one or two eggs that choose not to hatch is entirely normal. And the second is that generally speaking the less you do the better the outcome. Chicks have been hatching from eggs for quite a long time and they are generally pretty good at it. Human intervention should be the exception rather than the rule.
Now chickens take 21 days to incubate and ducks take 28. So the eggs that end up at your facility are put into our incubator about 3 weeks prior to us arriving. We operate big commercial incubators which are carefully controlled for temperature and humidity. Now not all eggs are fertile so we check them for fertility at several points of the process and we endeavour to provide you with eggs that we feel are viable and ready to hatch within a few days of arrival.
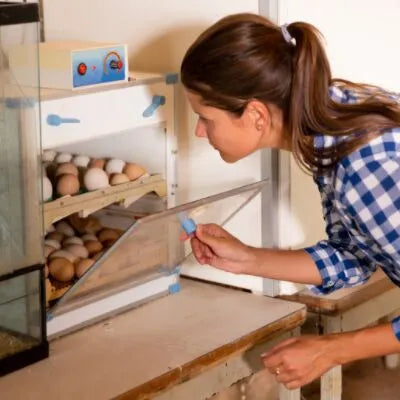
So when we arrive at your facility one of the first things the driver will do is plug in the hatcher. The hatcher is pre-set to between 37 and 37.5 degrees which is the ideal temperature range. There is a water reservoir inside the hatcher that should always have water in it. This water is used to ensure there is sufficient humidity inside the hatcher so that the chicks do not get stuck inside their shells when coming out. This water will last for about three or four days and then you need to top it up again with lukewarm water. Ensure there is always water inside the reservoir.
If we supply you with duck eggs please remember that the duck eggs will hatch on the Monday after the weekend so ensure that the water is filled before you leave for the weekend.
Avoid opening the lid of the hatcher as much as possible. The more often the lid is open the more difficult it will be for the chicks to hatch. When you do need to lift the lid, to either turn the duck eggs or move a chick to the brooder just try and do everything as quickly as possible try and keep the temperature and humidity as stable as possible.
Now when a chick decides it is time to hatch the first thing they will do is “pip” the shell. This will be a small crack, usually no more than about 3 to 5mm in size. The chick will then rest for a while and then start trying to hatch in earnest a few hours later. On average a chick will take about 12 hours to hatch, but it can be as quick as 4 hours after the pip or as long as 24. If you have a chick that has not made a lot of progress after about 24 hours you can help it out if you wish. We have a separate video to tell you how to go about that.
When chicks do hatch they will be all wet and wobbly and they won’t be able to stand up immediately after hatching - quite often they will flop on their backs or lay on their sides. At this stage all they need is warmth and humidity so the best place for them is inside the hatcher. Leave them in the hatcher until they are completely dry - note that the back of their necks are usually the last part of their down to dry out. You are not doing them any favours rushing them from the hatcher to the brooder. Patience is a virtue in this instance.
Likewise, if any chicks hatch weak or deformed there's also information on the website under chicken health.
Chicks don't need to eat or drink for the first 48 hours of life so it's fine to leave them in the hatcher overnight if they've hatched late in the day. Once the first one hatches, try and wait for it to have a mate that's also ready to go into the brooder box because they don't like being on their own.